Power outages are common in many parts of India, especially during monsoons or extreme weather. A solar-powered emergency light is a great solution. It is eco-friendly, cost-effective, and easy to make at home. This DIY project can light up your home during blackouts. It also reduces your carbon footprint. In this article, we will guide you step-by-step to create a solar-powered emergency light. The guide is tailored for Indian households. It uses simple materials and basic tools. Let’s dive into this fun and practical project!
Why Choose a Solar-Powered Emergency Light?

Solar energy is renewable and free. It does not depend on the power grid. This makes it perfect for emergencies. In India, rural areas often face long power cuts. Urban areas also experience outages during storms or maintenance. A solar emergency light ensures you are never left in the dark. It is safer than candles, which can cause fires. It is also cheaper than battery-powered torches over time. Plus, it’s a great way to learn about solar technology. This project is ideal for students, hobbyists, and families.
Materials Needed
To build a solar-powered emergency light, you need a few components. Most are easily available in local markets or online stores like Amazon India. Here’s what you need:
- Solar Panel: A small 5V or 6V solar panel (3-5 watts). It charges the battery using sunlight.
- Rechargeable Battery: A 3.7V lithium-ion battery (18650, 2000mAh) or a 4V lead-acid battery. You can also use a single AA NiMH battery (2000mAh).
- Battery Charger Module: A TP4056 module with USB input. It protects the battery from overcharging.
- LEDs: 10-20 white straw hat LEDs or a 3W LED bulb. These are bright and energy-efficient.
- Charge Controller: A small charge controller to regulate power flow.
- Switch: A simple toggle or SPDT switch to turn the light on or off.
- Resistors: 10k ohm and other values based on your circuit.
- Transistor: An NPN transistor like 2N3904 for automatic switching.
- Light-Dependent Resistor (LDR): To make the light turn on automatically at night.
- Diode: A 1N4001 or 5402 diode to prevent reverse current.
- Wires: 12-14 gauge wires for connections. Use outdoor-resistant wires for durability.
- Enclosure: A plastic box or a 2-liter plastic bottle for housing the circuit.
- Tools: Soldering iron, wire cutter, screwdriver, multimeter, and hot glue gun.
- Optional: A boost converter module for USB charging or powering devices.
These items cost around ₹500-₹1,500, depending on quality. You can find them in electronics shops in cities like Delhi, Mumbai, or Bengaluru. Online platforms like Flipkart or IndiaMart also have them.
Anúncios
Also Read Top Solar Street Lights for Urban Areas in India
Step-by-Step Guide to Build the Light
Follow these steps to create your solar-powered emergency light. Be careful when handling electrical components. Always prioritize safety.
Step 1: Plan Your Circuit
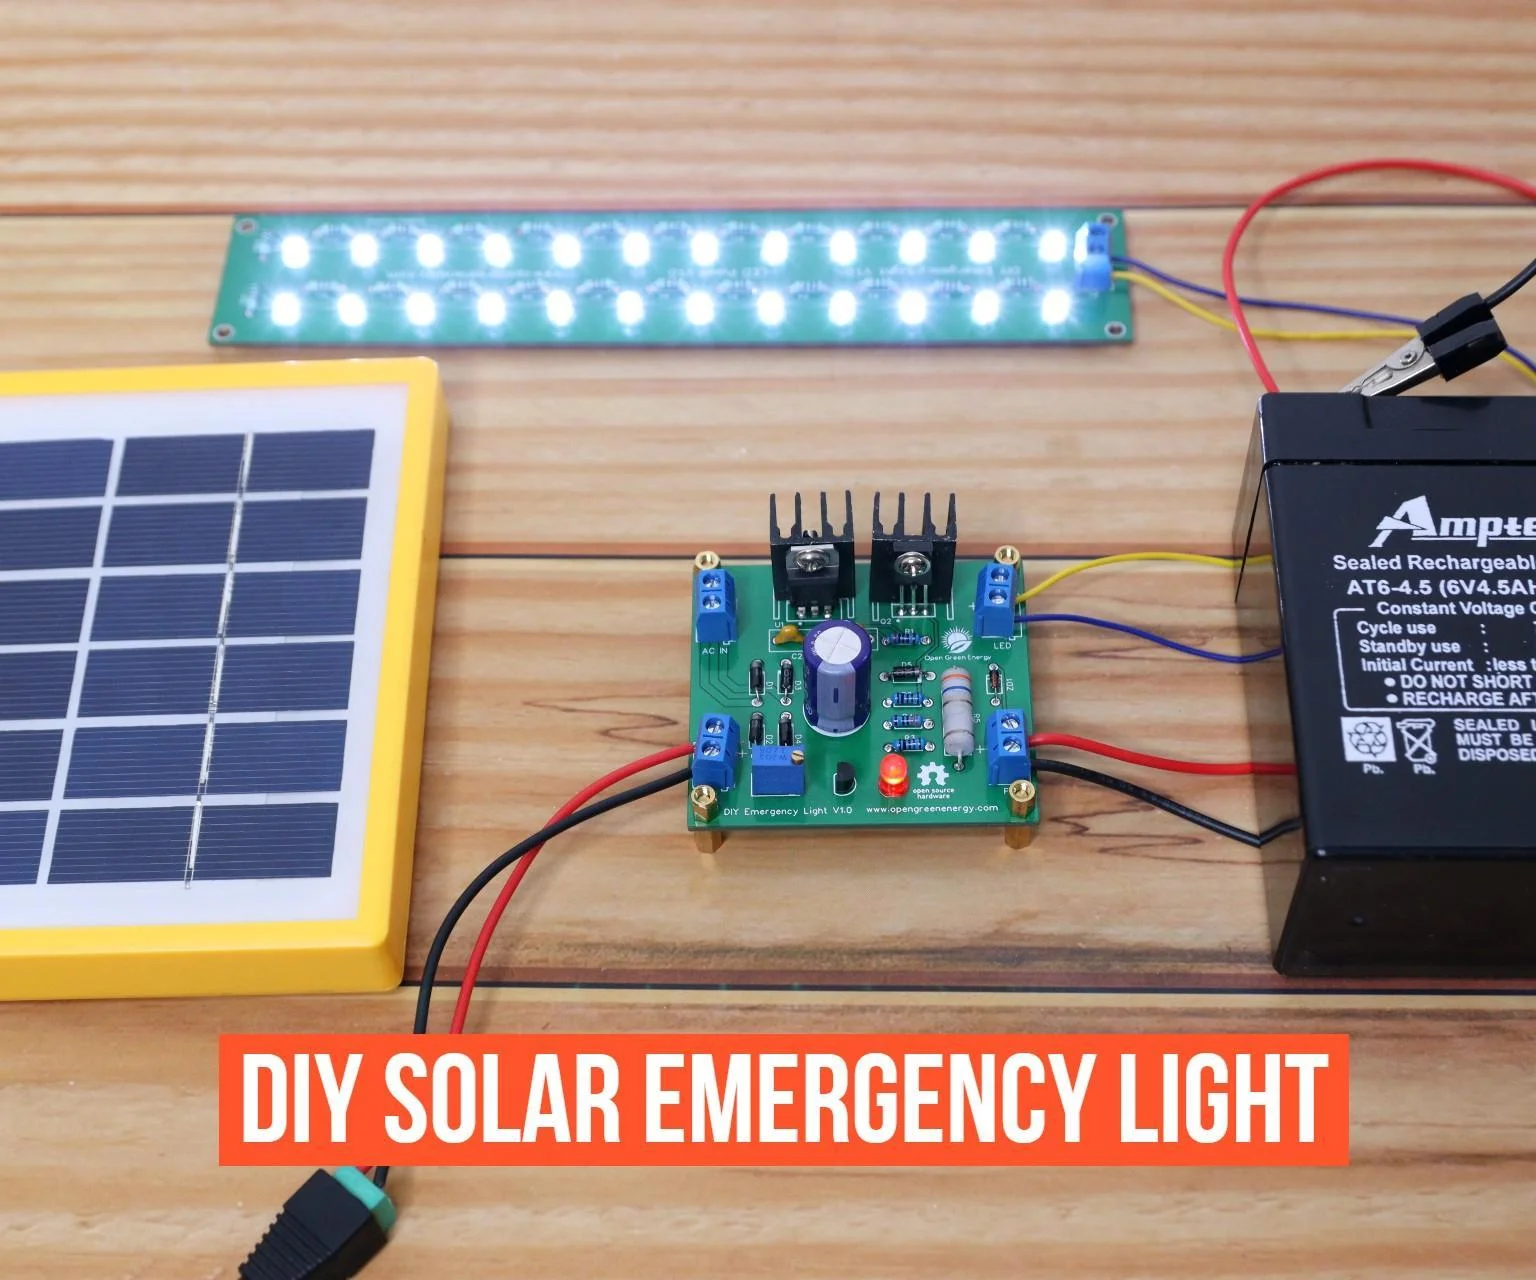
Before starting, understand the circuit. The solar panel charges the battery during the day. The battery powers the LEDs at night. The charge controller prevents overcharging. The LDR and transistor make the light automatic. It turns on in the dark and off in bright light. You can find circuit diagrams online at sites like Instructables or Open Green Energy.
Step 2: Set Up the Solar Panel
Choose a small solar panel (5V, 3-5W). Place it where it gets maximum sunlight, like a balcony or terrace. In India, south-facing panels work best. Secure the panel with screws or adhesive. Connect its positive and negative wires to the charge controller. Use a 1N4001 diode in series to prevent reverse current. This protects the panel.
Step 3: Connect the Battery
Use a 3.7V 18650 lithium-ion battery or a 4V lead-acid battery. Lithium-ion batteries are lightweight and common in India. Connect the battery to the TP4056 charger module. The module has a micro-USB port. You can charge the battery with a phone charger if there’s no sunlight. Ensure the positive and negative terminals are correctly connected. Use a multimeter to check polarity. The TP4056 module prevents overcharging, which is key for battery safety.
Step 4: Build the LED Circuit
Take 10-20 straw hat LEDs or a 3W LED bulb. Straw hat LEDs are cheap and bright. Arrange them in parallel or series based on your battery voltage. For a 3.7V battery, connect LEDs in parallel with a 10k ohm resistor. Solder the LEDs to a small perforated board. If using a 3W LED, connect it directly to the battery output via a driver circuit. Test the LEDs with a multimeter to ensure they light up.
Step 5: Add the Automatic Feature
To make the light automatic, use an LDR and an NPN transistor (2N3904). The LDR detects light levels. In darkness, it triggers the transistor to turn on the LEDs. Connect the LDR in series with a 10k ohm resistor to the transistor’s base. When light falls on the LDR, resistance drops, and the LEDs stay off. In the dark, resistance rises, and the LEDs turn on. This feature saves battery power.
Step 6: Assemble the Charge Controller
The charge controller connects the solar panel, battery, and LEDs. It regulates power flow. Connect the solar panel’s output to the controller’s input. Link the battery to the controller’s battery terminals. Connect the LED circuit to the controller’s load terminals. Use a small 5V charge controller for this project. It’s affordable and widely available in India.
Step 7: House the Circuit
Place all components in a plastic enclosure or a 2-liter plastic bottle. A bottle is a budget-friendly option in India. Cut holes for the LEDs, LDR, and switch. Mount the LEDs at the bottle’s mouth for maximum light spread. Place the solar panel on top at an angle. Secure the battery and circuit inside with hot glue. Ensure the enclosure is weatherproof for outdoor use.
Step 8: Test the System
Place the solar panel in sunlight for 4-6 hours. In India, sunny days provide ample charging time. Check if the battery charges (the TP4056’s red LED will light up). Test the LEDs by covering the LDR to simulate darkness. The light should turn on automatically. If it doesn’t, check connections with a multimeter. Adjust the resistor or LDR if the light is too dim.
Step 9: Add Optional Features
You can make the light more versatile. Add a USB port to charge phones using a boost converter module. Include a deep-discharge warning circuit to beep when the battery is low. Use a SPDT switch to toggle between 24 or 48 LEDs for different brightness levels. These features make the light more practical for Indian households.
Safety Tips
Working with solar circuits requires care. Here are some tips:
- De-energize Circuits: Disconnect the solar panel and battery before soldering.
- Wear Protective Gear: Use gloves and safety glasses to avoid burns or shocks.
- Check Polarity: Incorrect connections can damage components.
- Avoid Overcharging: The TP4056 module helps, but monitor the battery regularly.
- Use Quality Components: Cheap parts may fail quickly. Buy from trusted suppliers like IndiaMart or local shops in Electronics City, Bengaluru.
Benefits for Indian Households
This solar emergency light is perfect for India. It addresses common issues like power outages during monsoons or in rural areas. In villages, where 74 million households lack reliable power, this light replaces harmful kerosene lamps. Kerosene lamps produce 250 kg of CO2 per year and cost 5% of a family’s income. A solar light is safer and saves money. It also helps children study at night, improving literacy. The light is portable, making it ideal for camping or travel.
Cost and Maintenance
The total cost is ₹500-₹1,500, depending on components. A 5V solar panel costs ₹200-₹400. A TP4056 module is ₹50-₹100. LEDs cost ₹5-₹10 each. A lithium-ion battery is ₹150-₹300. Maintenance is minimal. Clean the solar panel monthly to remove dust, especially in dusty areas like Rajasthan or Delhi. Check battery health every six months. A good NiMH or lithium-ion battery lasts 3-5 years.
Where to Buy Components in India
- Local Markets: Visit Lamington Road (Mumbai), Chandni Chowk (Delhi), or SP Road (Bengaluru) for electronics.
- Online Stores: Amazon India, Flipkart, IndiaMart, or Robu.in offer solar panels, LEDs, and TP4056 modules.
- Solar Shops: Check stores in Coimbatore, Chennai, or Surat for solar components.
Challenges and Solutions
- Cloudy Days: Solar panels charge slower in cloudy weather. Use a larger battery (e.g., 3400mAh) for longer backup. You can also charge via USB.
- Component Quality: Cheap LEDs or batteries may fail. Buy from trusted brands like Eveready or Panasonic.
- Skill Level: If you’re new to soldering, practice on a breadboard first. Watch YouTube tutorials for guidance.
Conclusion
Building a solar-powered emergency light is a rewarding project. It’s affordable, eco-friendly, and useful for Indian households. With power outages common in cities and villages, this light ensures safety and convenience. The project teaches you about solar energy and electronics. It’s also a step toward sustainable living. Gather your materials, follow the steps, and light up your home the green way. Share your creation with friends and family to inspire them. Let’s make India brighter and greener, one solar light at a time!
Author- Ayush